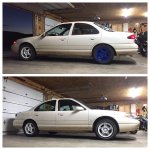
Washed and detailed the "new" 99 SVT and started swapping all parts over from the 2000 SVT.. but weird to see subtle differences in some things car to car..
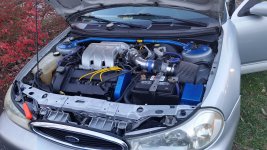
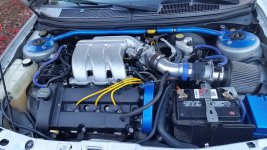
Worked on swapping the UIM vacuum line over and found out on BOTH cars the little groment that holds the tube is broken/missing on the cars.. NICE!!!
I actually did the opposite of your center console swap. I put a center console
from a 98 mystique in my 96. I just replaced the entire interior with a leather interior from a mystique and I was afraid the armrest on the drivers seat would interfere with the storage lid in the 96 console. I pulled the fake wood console trim and put that in. I just need a power window kit to complete the swap and to put in the leather steering wheel. The mystique seats have way more padding than the cloth GL seats. The interior is so much nicer now. Half off day at the junk yard is the best.
today i diagnosed why my fuel pump randomly decides to shut itself off... havent gotten very far yet... managed to finally post my other svt up on the forums for sale.. take a peak guys im parting it all out
I repainted and finally fixed Saggy Bumper Syndrome.
1. With the bumper off, added an 1.25" L brace where the flimsy plastic "support" used to go. (Who designed that crap?) Added another 1.25" L brace to the frame. Cut a 6-7" piece of U channel 1/2" aluminum. Replaced bumper and bolted the vertical aluminum strut to the L braces.
2. Replaced the top two center plastic push buttons (not sure of the technical name) with heavy duty bolts and washers.
3. Drilled three small holes (L C R) on the top of the bumper and added 3 lightweight sheet metal screws with washers.
Voila! No shimmy, shake or sag. And no scraping backing down the driveway.