• Welcome to the Contour Enthusiasts Group, the best resource for the Ford Contour and Mercury Mystique.

    You can register to join the community.

Alternator R&R Duratec

CSVT#49

Addicted CEG'er
Joined
May 28, 2004
Messages
6,770
Location
Andover, MN
phew. Well all work was not done in vain. Took the alternator from the car up to the O'Reillys and it did fail on their bench. Just finished installing the alternator I had sitting around and boda bing boda boom 13.9V, winner!

Oh by the way the alternator replacement how-to is no longer available in the general maintenance forum FYI. All three bolts can be accessed from the bottom easily once you find the sweet spots with a 13mm socket for the two flange bolts, 10mm for the bracket bolt, universal joint, and two long extensions (5" I believe). I wish I would have taken some pictures, but ugh I just wanted this crap finished. I was sweaten big time there with CarCraft Summer Nationals coming up this Friday.

Anyway thanks to all for the pointers guys, CEG rocks the house again. As it turns out my initial thought was correct. Just fricken weird that the alternator just went fubar while I had the car down for powder coating...

EDIT: I went back and took a bunch of pictures of the new installation basically, but it shows the tools I used and where I put them to get the bolts out. I'll post up an updated How-To in the general maintenance forum so that people can see pictures since Ray's old How-To is lost with the rest of the archives. Stay tuned...
 
Found a .pdf copy of Ray's old how to post. Too late for CSVT#49 but might help others.


_
 

Attachments

  • Alternator Replacement.pdf
    1.8 MB · Views: 0
Found a .pdf copy of Ray's old how to post. Too late for CSVT#49 but might help others.


_

That's a good how-to, but it kinda lacks pictures of the bolt locations. Also there is no need to remove the coil pack and go in from the top. The top bolt on the alternator is easily accessible from the bottom as are the other two bolts. I'm going to submit my pictures and a small write up to the general maintenance how-to. However I'll post up the pictures here as well if someone searches here.
 
Here is a brief explanation through the use of photos of the removal of my alternator.

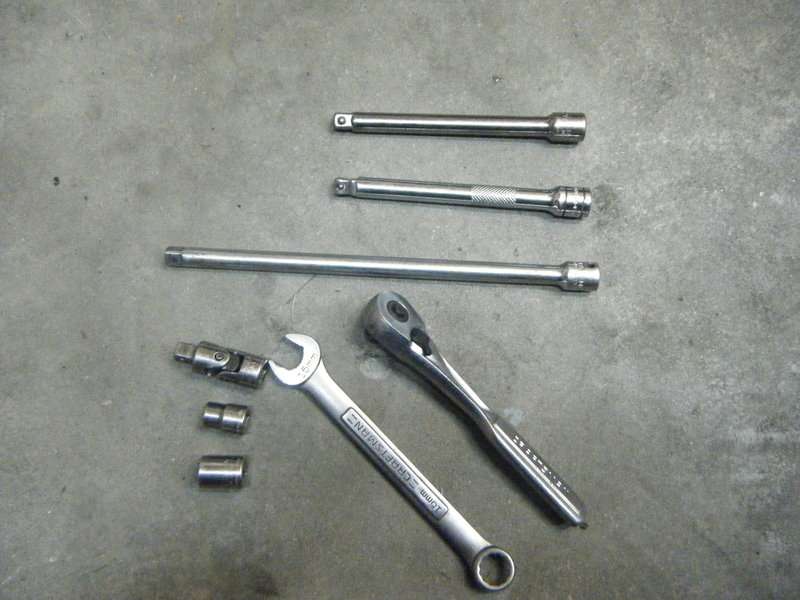
Tools:
15mm wrench (or 15mm deep well 6 point socket)
3/8” universal
3/8” 10mm 6 point socket
3/8” 13mm 6 point socket
3/8” ratchet
3/8” breaker bar
3/8” extentsions
1 – 8”
2 - 5”
Torque wrench capable of 25, 28, 45 and 128Nm
block of wood and hammer (or rubber mallet)
toolsy.jpg


Not shown is the removal of the wheel (reinstall lug nuts at 128Nm) and removal of the wheel well covers.

Drop light placement to fully light alternator removal (EGR recirculation pipe)
droplightplacement.jpg


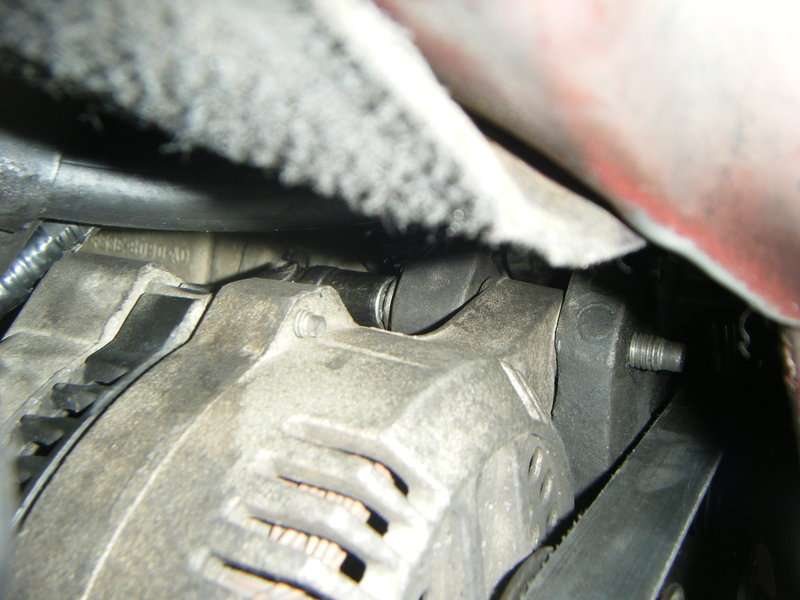
Bolts on lower portion of alternator
lowermidboltcircled.jpg


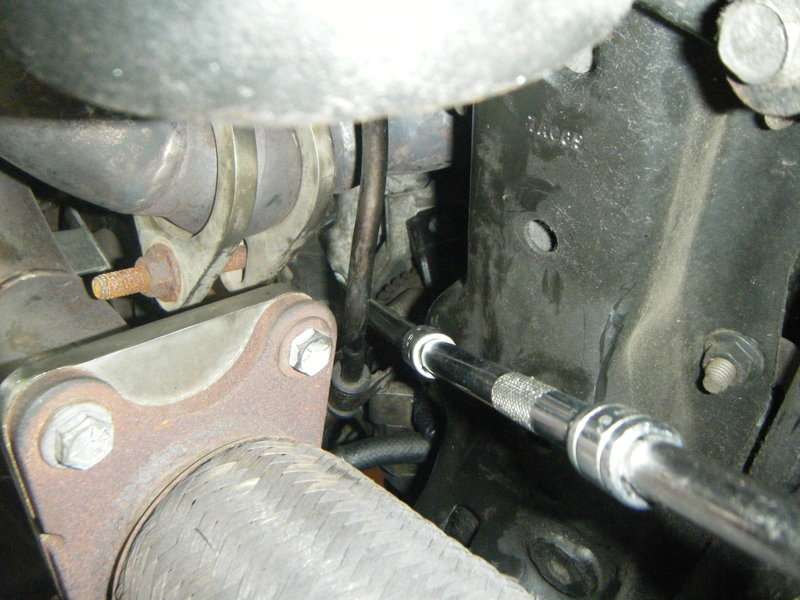
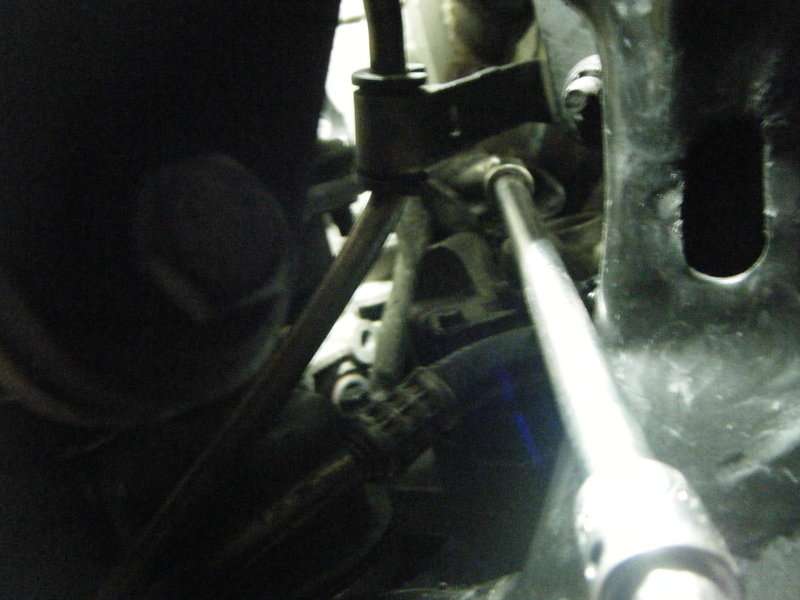
Lower bolt extension placement (below steering rack hard line)
lowerboltextplacement.jpg


Lower bolt with socket on it with above extension placement (lower bolt removal uses 13mm socket and should be reinstalled at 45Nm)
lowerbolt.jpg


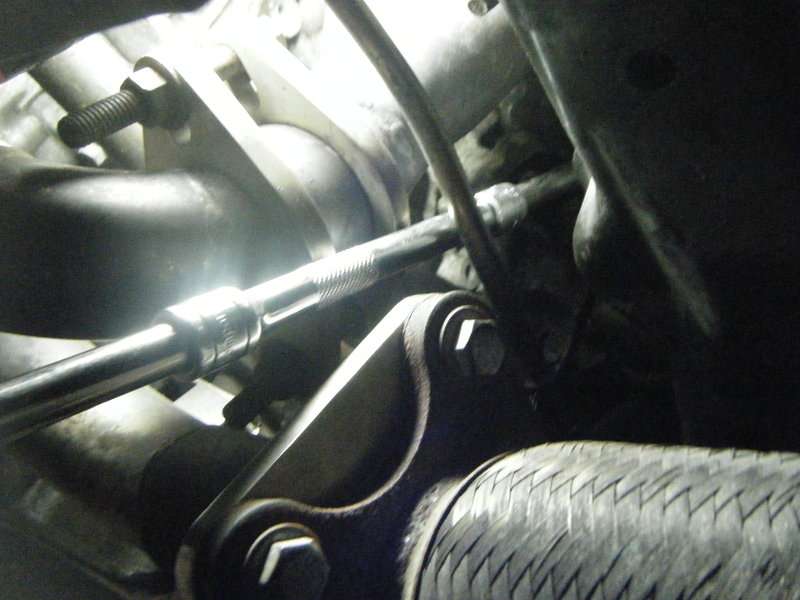
Upper bolt extension placement (above steering rack hard line)
upperboltextplacement.jpg


Upper bolt with socket on it shot from wheel well (Upper bolt removal uses 13mm socket and should be reinstalled at 45Nm)
upperbolt.jpg


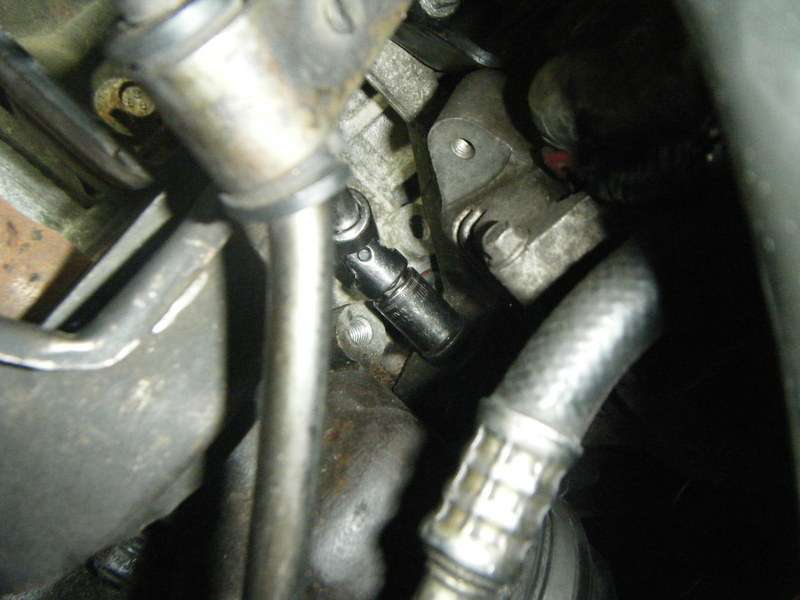
Mid bolt extension placement and bolt (Mid bolt removal uses 10mm socket and should be reinstalled at 25Nm)
midboltextplacement.jpg


Tie rod removed using 15mm wrench after cotter pin is removed (reinstall at 28Nm with new cotter pin). Note do not use a pickle fork as you will more then likely reck the boot. Take a block of wood, line it up with the stud of the tie rod end and hit it with a hammer (or use of rubber mallet) to pop the tie rod end out of the knuckle. This is required so that the alternator may be dropped down, tilted back and then pulled out through the opening created by the tie rod removal shown below.
alternatordrop.jpg
 
Alternator Info.

Alternator Info.

Hi Guys. I am new to this. But I had to Thank all the fellows that take the time and share their experince with projects they have accomplished. We all know how stressful tackling a job can be without any guidance. I am going to tackle the alternator this weekend. Seems relatively easy. Thanks to info and pictures. You guys all are an asset to society.
 
On a side note: If any have a difficult time trying to get the small black metal bracket back on, its okay to run the car without it. I havnt had it on my turbo'd car for years now. No drawback whatsoever. If anyone sees a potential problem tho, pls post. And i'm talking about the metal piece in the upper part of CSVT49's 3rd picture with the circled bolt.
 
It's easy to keep that on though. don't take out the bolt that attaches it to whatever all the way. it'll move around a bit to give you enough play to get the alternator back in and then retighten that to the alternator. now changing the alternator is a pain though. I would NOT want to do this again.
 
I just completed this job on my SVT. It took about 2-1/4 hours to remove the alternator starting with driving it into my garage. I then took it to my local rebuilder who had one in stock and after walking out $132 dollars lighter I had my rebuilt alternator to install.

One thing I read was some people had problems getting the alt. to fit back into the slots that hold the alt to the bracket that bolts to the engine. I can see this as I had to pry out my alt. as it was a tight fit in there. The 12 years and some corrosion will do that. What i did to make it MUCH easier to install the "new" alt. was to widen the slots on the bracket.

To to this all you have to do is get a long drift, punch, or rod and a hammer. The bracket had two double lugs. One has a threaded hole that the bolt threads into and the other is just an oversize hole the bolt goes through first before it goes through the alt. mounting hole. This large hole has a steel split sleeve in it to prevent the bolt from deforming the aluminum when the bolt gets tightened. It is only a press fit so a few hard taps on the sleeve with the hammer and punch will force the sleeve out a bit leaving the slot where the alt. fits into a bit wider. When you tighten the bolts down the sleeve is forced back into positon and all is well.
 
good tip, thanks jimbbski,

and thanks to all who have contributed to this thread to make this daunting job a little more clear and a hell of lot less intimidating.
 
Rather then hammering or widening slots... I would suggest using a wire brush and solvent to remove the corrosion off of the bracket and alternator before reinstalling parts. Or better yet remove the alternator bracket, sand blast it, paint it and reinstall. However obviously some people may not want to take the time or money to complete my last suggestion.
 
I just completed this job on my SVT. It took about 2-1/4 hours to remove the alternator starting with driving it into my garage. I then took it to my local rebuilder who had one in stock and after walking out $132 dollars lighter I had my rebuilt alternator to install.

One thing I read was some people had problems getting the alt. to fit back into the slots that hold the alt to the bracket that bolts to the engine. I can see this as I had to pry out my alt. as it was a tight fit in there. The 12 years and some corrosion will do that. What i did to make it MUCH easier to install the "new" alt. was to widen the slots on the bracket.

To to this all you have to do is get a long drift, punch, or rod and a hammer. The bracket had two double lugs. One has a threaded hole that the bolt threads into and the other is just an oversize hole the bolt goes through first before it goes through the alt. mounting hole. This large hole has a steel split sleeve in it to prevent the bolt from deforming the aluminum when the bolt gets tightened. It is only a press fit so a few hard taps on the sleeve with the hammer and punch will force the sleeve out a bit leaving the slot where the alt. fits into a bit wider. When you tighten the bolts down the sleeve is forced back into positon and all is well.


This is correct.
 
The bolts can also be reached from LH side if car with VERY long extension fed through the area between the transmissin/engine and firewall. Ford Master Tech showed me that one.
 
Back
Top