FIND
Addicted CEG'er
Site note: please embark on this how-to with CARE. This is not an easy task, nor for the faint-of-heart. Mistakes can be time consuming and costly. All methods below are that of the user and not a reflection of the site (or staff) and their views.
Before doing anything, wash your car with soap and water, and a good wax and grease remover. Make sure you get all the wax and grease removed or you will just drive it into your sanded surface and paint wont stick.
Make sure the area you are working in is very clean and very well ventilated.
you want to start by roughing up the old paint, if it is in good condition and hasnt been recoated before, you can paint right over the existing paint job. if the paint is badly peeling or cracked, you may have to take it down to bare metal and prime the whole vehicle to get good results. Sand to 400 grit for primer, 600 for paint.
once you are done sanding, clean the surface carefully, paint thinner or brake cleaner works good it, you dont want anything that will leave any type of residue on your sanded areas of your vehicle. also clean your work area. then its always a good idea to attach a copper wire from your frame of your vehicle to an earth ground, such as... the ground. this will prevent static buildup from the paint hitting the surface and that will keep dust out of your paint job.
Now lots of people tell you to wet the floor before you paint. Absolutely under no circumstances are you to do this. Urethane paints are a moisture cure paint. moisture on the floor will create humidity in the air, as this humidity rises it will pass through your spray. The paint drops several degrees in temperature as it leaves your nozzle and this will cause some of your paint to cure before it even hits your vehicle. this will also get lots of dust in your paint job.
Take your time in masking, paint will go everywhere you dont cover, so mask carefully. Also use premium body fillers, you dont want to use something cheap like bondo that shrinks or dries to quickly or unevenly. this will cause cracks as it cures and will show through your paint job.
now after priming, you may wish to spray a very very light coat of black over the vehicle, this will work as a guide coat cause it will collect in the low areas. You can use this as a sanding guide if you want a truly professional show quality finish.
Urethane parts on your cars, such as bumpers will not require a flexing agent to be added to your paint as long as you are using a urethane paint, but I do recommend that you use adhesion promoter so that the paint will stick well to plastic parts.
for the rest of this it is time to put on your charcoal respirator at least. you dont want to breath this stuff in.
now the rest is simple, mix the paint as the instructions that will be include with your paint says. for instance Nason black urethane requires 8 parts paint 1 part activator and 4 parts thinner. Formulas may differ from paint to paint. You can change the formulation slightly if you know what you are doing to accomodate different painting conditions, however over thinning paint just to stretch it if you dont have enough is really counterproductive, since the more you thin it, the more you lose in the air, and the less you will be able to cover. Now then back to mixing, you will need a measuring cup, no dont raid your momma's cabinets, buy a couple quart size measuring cups with easy to read graduations, you can purchase these at automotive stores or your paint dealer. Mixing 8 to 1 to 4 basically means that if you have 8 cups of paint you mix 1 cup of hardener and 4 cups of reducer. or you can have 4 cups of paint 1/2 cup hardener 2 cups reducer and so on.
stir your paint well, then pour it carefully in to the can on your paint gun through a filter. Use the cheap paper filters, they are more than enough, your dealer will usually give you a few dozen with your paint when you buy it.
Now comes the fun part. Read the instructions with your paint to determine which sized nozzle you want on your gun, and what pressures to run your gun at. You should also be very familiar with your gun so you know what guidlines you need to stick to. Now you want to start spraying, you are sitting there itching to put that paint on the car, but wait. turn to a piece of scrap, or even an old piece of plywood or cardboard, you want to spray a test pattern on it. This is so you can be sure you are getting proper atomization from your paint and you are getting the desired spray pattern. It is also good practice so that you can get the feel of how far you need to hold the gun and what speed to move to get your desired amount of coverage.
Now, you are ready to move on to your surface to be painted. you want to move along your surface in slow sweeping motions and keep your gun an even distance from your surface, while keeping the gun perfectly parallel to the surface. you want your spray to be even on all sides of the pattern, this mean your gun needs to be facing flat against your surface, if it isnt, you will see the waves, high spots, and roughness in your finished paint job. You cannot sand that out.
Now you will need to make at least 3 light coats for a single stage paint job, make sure you overlap at least 50% with every pass and make sure that you allow the paint to flash a short period between recoats, but not to long, cause you want some tackiness to the paint for the next coat to really grab onto. you do this and you will end up with a really nice smooth finish that you will ask yourself if you even need to sand when its done. A base clear paint job I usually find needs at least 2-3 coats of basecoat covered by 2 coats of clearcoat. Make sure you clean or change nozzles between your base and clear.
Now you need to stand back and admire you work for a little while, also let it dry, dont touch it, and let it sit undisturbed until it is finished drying.
you will want to wetsand and polish within 24 hours of painting for the best results, that way the paint is not fully cured and is easier to sand through. Yes you are taking paint back off that you put on, but not to much.
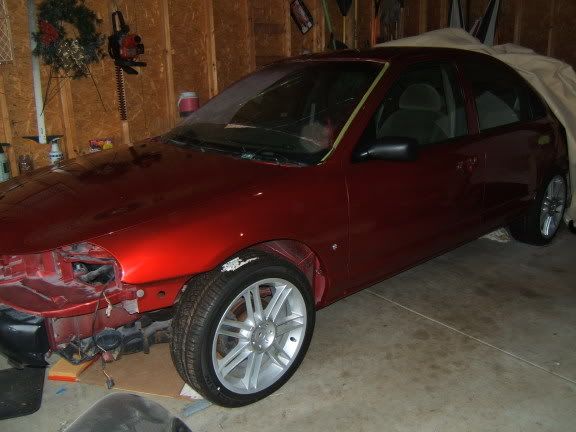
I may write a howto for wetsanding polishing buffing that kinda stuff, but IDK depends on if I get time, I am gonna go to bed for tonight. BTW if you look at my contour in my profile and want to say this guy cant know a thing about painting. I rattle canned that in my driveway one day when I was bored and my garage was out of service for the summer. it was hot, humid, there were thousands of bugs, and I live right next to a gravel road that gets a lot of traffic when girls want to bother me. lol. Anyways I am repainting it in a couple weeks, look forward to pics in my cardomain of the results. If you want to see some of my other work, pm me and I can send you pics of the semis I paint at work.
Before doing anything, wash your car with soap and water, and a good wax and grease remover. Make sure you get all the wax and grease removed or you will just drive it into your sanded surface and paint wont stick.
Make sure the area you are working in is very clean and very well ventilated.
you want to start by roughing up the old paint, if it is in good condition and hasnt been recoated before, you can paint right over the existing paint job. if the paint is badly peeling or cracked, you may have to take it down to bare metal and prime the whole vehicle to get good results. Sand to 400 grit for primer, 600 for paint.
once you are done sanding, clean the surface carefully, paint thinner or brake cleaner works good it, you dont want anything that will leave any type of residue on your sanded areas of your vehicle. also clean your work area. then its always a good idea to attach a copper wire from your frame of your vehicle to an earth ground, such as... the ground. this will prevent static buildup from the paint hitting the surface and that will keep dust out of your paint job.
Now lots of people tell you to wet the floor before you paint. Absolutely under no circumstances are you to do this. Urethane paints are a moisture cure paint. moisture on the floor will create humidity in the air, as this humidity rises it will pass through your spray. The paint drops several degrees in temperature as it leaves your nozzle and this will cause some of your paint to cure before it even hits your vehicle. this will also get lots of dust in your paint job.
Take your time in masking, paint will go everywhere you dont cover, so mask carefully. Also use premium body fillers, you dont want to use something cheap like bondo that shrinks or dries to quickly or unevenly. this will cause cracks as it cures and will show through your paint job.
now after priming, you may wish to spray a very very light coat of black over the vehicle, this will work as a guide coat cause it will collect in the low areas. You can use this as a sanding guide if you want a truly professional show quality finish.
Urethane parts on your cars, such as bumpers will not require a flexing agent to be added to your paint as long as you are using a urethane paint, but I do recommend that you use adhesion promoter so that the paint will stick well to plastic parts.
for the rest of this it is time to put on your charcoal respirator at least. you dont want to breath this stuff in.
now the rest is simple, mix the paint as the instructions that will be include with your paint says. for instance Nason black urethane requires 8 parts paint 1 part activator and 4 parts thinner. Formulas may differ from paint to paint. You can change the formulation slightly if you know what you are doing to accomodate different painting conditions, however over thinning paint just to stretch it if you dont have enough is really counterproductive, since the more you thin it, the more you lose in the air, and the less you will be able to cover. Now then back to mixing, you will need a measuring cup, no dont raid your momma's cabinets, buy a couple quart size measuring cups with easy to read graduations, you can purchase these at automotive stores or your paint dealer. Mixing 8 to 1 to 4 basically means that if you have 8 cups of paint you mix 1 cup of hardener and 4 cups of reducer. or you can have 4 cups of paint 1/2 cup hardener 2 cups reducer and so on.
stir your paint well, then pour it carefully in to the can on your paint gun through a filter. Use the cheap paper filters, they are more than enough, your dealer will usually give you a few dozen with your paint when you buy it.
Now comes the fun part. Read the instructions with your paint to determine which sized nozzle you want on your gun, and what pressures to run your gun at. You should also be very familiar with your gun so you know what guidlines you need to stick to. Now you want to start spraying, you are sitting there itching to put that paint on the car, but wait. turn to a piece of scrap, or even an old piece of plywood or cardboard, you want to spray a test pattern on it. This is so you can be sure you are getting proper atomization from your paint and you are getting the desired spray pattern. It is also good practice so that you can get the feel of how far you need to hold the gun and what speed to move to get your desired amount of coverage.
Now, you are ready to move on to your surface to be painted. you want to move along your surface in slow sweeping motions and keep your gun an even distance from your surface, while keeping the gun perfectly parallel to the surface. you want your spray to be even on all sides of the pattern, this mean your gun needs to be facing flat against your surface, if it isnt, you will see the waves, high spots, and roughness in your finished paint job. You cannot sand that out.
Now you will need to make at least 3 light coats for a single stage paint job, make sure you overlap at least 50% with every pass and make sure that you allow the paint to flash a short period between recoats, but not to long, cause you want some tackiness to the paint for the next coat to really grab onto. you do this and you will end up with a really nice smooth finish that you will ask yourself if you even need to sand when its done. A base clear paint job I usually find needs at least 2-3 coats of basecoat covered by 2 coats of clearcoat. Make sure you clean or change nozzles between your base and clear.
Now you need to stand back and admire you work for a little while, also let it dry, dont touch it, and let it sit undisturbed until it is finished drying.
you will want to wetsand and polish within 24 hours of painting for the best results, that way the paint is not fully cured and is easier to sand through. Yes you are taking paint back off that you put on, but not to much.
I may write a howto for wetsanding polishing buffing that kinda stuff, but IDK depends on if I get time, I am gonna go to bed for tonight. BTW if you look at my contour in my profile and want to say this guy cant know a thing about painting. I rattle canned that in my driveway one day when I was bored and my garage was out of service for the summer. it was hot, humid, there were thousands of bugs, and I live right next to a gravel road that gets a lot of traffic when girls want to bother me. lol. Anyways I am repainting it in a couple weeks, look forward to pics in my cardomain of the results. If you want to see some of my other work, pm me and I can send you pics of the semis I paint at work.
Last edited by a moderator:
 )
)