• Welcome to the Contour Enthusiasts Group, the best resource for the Ford Contour and Mercury Mystique.

    You can register to join the community.

White plastic retaining ring on the filler neck

When you get the leak stopped, I pulling for you, go to Advanced and get quart
Of "Right Stuff De-Ruster". I put mind in an empty trigger spray bottle and soaked the rust. Let sit over night the rust is converted and then that is turn in to "phosphate". It best and easiest way stop rust and this surface paint or coatings bond so much better.
This stuff a boon for us rust haters in salt country.
My next steps are priming with Rust-Oleam's "Cold galvanizing and the Zinc rich Cold galvanizing paint. If I had the money I'd use POR-15 but as parts are getting harder to come by for the Tours not sure if I need to last that long?
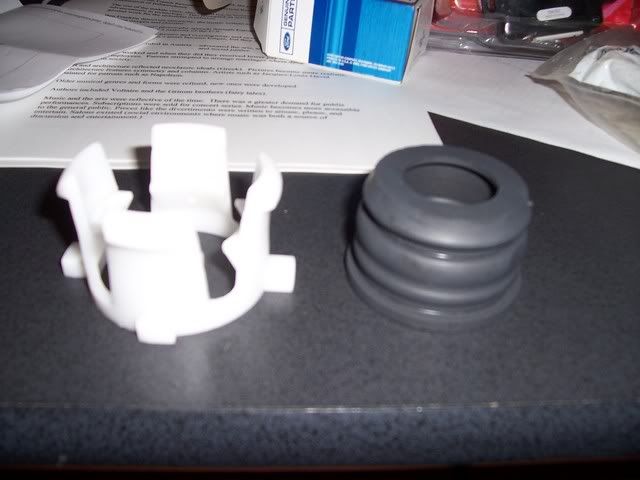
PARTS. I take it the Cougar filler and gas tank parts are the same?
TNX

Just found out that Home Depot has Phosphoric acid and I'm sure any automotive paint supply. Use eye protection!!!!
 
Last edited:
Pictures???

I didn't take any of the actual process because I was busy wrestling with the gas tank. It's not very difficult to figure out.

First I unpressurized the line (okay no I didn't, but I'd recommend it :) )
Then disconnect the line running from the fuel filter to the front of the car.

Then remove the heat shield for your exhaust in front of the tank so you can get at the bolts for the tank.

Disconnect the hangers for the exhaust from about the tank back and lower it down so it's out of your way when you need to lower the tank.

Then if you're taking the tank out completely you'll need to disconnect the rear vent hose (PITA) and unhook the fuel pump from under your rear seat. I skipped those as I just needed the tank low enough to slide it off the filler neck.

Then you have to disconnect the retaining clip on the filler neck (easiest way is to just break it and replace it with the part number I had above) and slide the tank of, keeping it level.

There's a how to for this, it's for an SVT Focus Returnless Pump Install but same principal.
 
Okay sounds doable. Could you see that the retaining clip was broke before you lowered the tank? Or should I just awesome it is broke and buy it ahead of the drop so I only have to do this once?

How did you pull the exhaust hangers off their bushings? This has always been a PITA for me.
 
Okay sounds doable. Could you see that the retaining clip was broke before you lowered the tank? Or should I just awesome it is broke and buy it ahead of the drop so I only have to do this once?

How did you pull the exhaust hangers off their bushings? This has always been a PITA for me.
Would be great to have garage with a lift, Ah it's fun to dream?

That seal is it easy to tell if it will fit only one way, the Ford CD is useless but if I had this to do I'd put the seal into the tank first. I'm looking at a Chilton's that seal looks a lot taller/longer but it at least shows it the Ford CD nothing???
If you where to take take the seal the way it's sitting on table the top would be facing outward toward the filler pipe.
Unfortunately the drawing in Chiltons shows the seal having only crease/groove and your new part has three? Maybe Steve remembers or the newer tanks have more than one rib in the opening on the tank? How do the Ford mechanics deal with these inadequate service manuals????
This rust issue?
What is Minnesota using on the roads during winter? I bet they are heavy into that brine crap Ohio started using several years ago. The all garages around here have been very busy replacing brake lines on vehicles some only two or three years old. All yes winter the season of constant spraying/flushing the underneath of vehicles!!!! Or as the wife refers to it - skating rink instead of a driveway. :rolleyes:
 
Last edited:
I fixed mine yesterday, so I figured I would write a follow up for any that come later.

Removal

I started by jacking the car as high as possible and putting it on jack stands. I also took off both rear wheels.

Next I released fuel pressure at the schrader valve in the engine compartment.

Next was dropping the exhaust. There are two rubber mounts at the back of the car and one in the middle. I just pulled the hangers out of the rubber mounts. It wasn't that hard.

Next I took the fuel line to the engine off of the fuel filter.

There are two bolts holding the fuel tank straps. One is easily accessible. The other required me to bend the exhaust heat shield back to reach it.

The tank will then be able to drop a little. It is a very tight fit so it will get hung up on a lot of stuff as it comes down. (my tank was nearly empty so I didn't drain it)

The filler tube must come out of the tank for it to drop farther. I didn't think I had any chance of removing the white clip, so I used a screwdriver to snap it into pieces. Then the tank will slide away from the filler tube.

Diagnoses
I found three problems. One, the rubber gasket that seals the filler tube to the tank had been pushed into the tank too far and at an angle. It also was partially split. Second the fuel vent tube was not attached to the vent nipple on the tank! (This is in the middle of tank towards the rear. As I filled the tank fuel would drain out of the vent onto the top of the tank and then the ground.) Three The fuel line from the fuel filter to the engine was routed wrong and was kinked. That had to be putting a strain on the pump.

I had a new rubber gasket for the filler tube, and new white clip. (The gasket does all the sealing. The white clip just keeps the filler tube from moving.) I would need to install them. When assembling I needed to be sure to get the vent tube on the tank. Finally I needed to route the fuel line to the engine better.

Assembly
The fun part. This was a PITA!

I slid the white clip onto the filler tube then pushed the rubber gasket onto the end of the tube. If you put the gasket into the tank the filler tube might catch on it and push it in at an angle. I think this is what happened to my car previously.

I struggled here for a while, but eventually I put the tank onto a jack centered under it. I jacked the tank up straight. I had to move position a lot to be sure the tank wasn't getting caught on anything. I guided the fill tube into the tank as I raised it. Though I left the white clip alone at this point.

As it came close to position it was time to get the vent line on. I barely had any ability to touch the line. It is just too tight in there. I got it to just start over the nipple and that was the best I could do. The vent line is short and must be placed on with the tank almost in position. As the tank went up the rest of the way it forced the vent tube over the nipple and into place. There is also a hose clamp for the tube. I never got it on. There was just no room. I was satisfied with this. The tube should only have vapor at low pressure. The fit is tight without a clamp. There is no room for the tube to back off the nipple. It should stay put.

If I had an extra car with me to get to the parts store I would have done this a bit different. I would have cut the vent pipe behind the subframe. This would allow me to attach the vent tube to the tank while it was on the ground. Then after installing the tank I could use a rubber fuel line to connect the split vent pipe.

After getting the tank all the way up, I pushed the white clip down and into position. It wouldn't go before this as the tube was at angle to the tank.

Push the shield back into place. Reinstall the tank straps and bolts. I messed with the fuel line a bit and found a route that didn't kink it. Pick the exhaust up and rehang it. Tires back on. Jack stands out. Pick up all the tools and you are done.

It took me 4 and half hours!!!! What a PITA!! and all because whoever worked on it before me, put the gasket in the tank instead of on the filler tube, and forgot to reattach the vent line!


Did you remove the fuel pump wiring from inside the car or did you just not remove the tank completely?

I still have to go in and see if I can fix mine from leaking attempt 2
 
Okay here are the part numbers:
Part XS2Z-9149-AA is the white retaining clip and
Part XS7Z-9072-AA is the boot that I'm assuming fits down into the tank. Not sure why I'd have to replace this but what the heck as long as I'm in there it's only five bucks.

56112b02.jpg


The white clip was 3.48 plus tax and the boot was 5.72 both from Steve at Tousley Ford, but prices are known to change a lot at the dealership so I wouldn't expect those exact prices someday down the road.

Out the door for under $10 bucks :cool: Hopefully the lowering the tank shouldn't go too bad, maybe I'll snap a few more pics while I'm under there.

At almost four years later, THANK YOU for the resource!
 
Glad it could help somebody else!

My leak never came back BTW. Must have fully seated after driving it for a little while. Although now the car needs a pump (fuel level sending unit is sticking lately).
 
At almost four years later, THANK YOU for the resource!

If you haven't put your car back together yet, you should consider getting the filler neck grit-blasted and then paint it with at least two coats of POR-15 or other equivalent rust preventing/sealing paint. I was doing the reinforced rear subframe upgrade and saw how bad my filler neck looked so I took care of it while the timing was convenient. New filler necks are no longer available if yours rusts out (there have been several incidents of this occurring).
 
<OS scribbles notes on hand>
"filler neck grit-blasted and then paint"
"rust preventing/sealing paint"
"filler necks are no longer available"
"The Eagles will win the Super-Bowl"
<OS scratches out one item>
 
Correct Seal Placement

Correct Seal Placement

Having now screwed this up myself once, then watching my neighborhood independent shop screw it up two more times, I had to look closer at the seal design, take some measurements, and draw it up to determine how it was designed to work.
Thanks to this forum for defining the part numbers required:
· Retaining Clip XS2Z-9149-AA
· Seal XS7Z-9072-AA
· Also to the descriptions for the tank R and R – such as post 25

A number of people have suggested that the seal should be placed on the filler tube, then the tube and seal inserted into the tank – this is how attempted it the first time (as well as how my local shop did it) – it leaked, and here is why.
The seal MUST be “snapped” into the tank fitting in order to seal – I believe this can only be done PRIOR inserting the filler neck - see figures below:
Presentation1..jpg
Note that the top of the seal is approximately ½” below the windows in the tank fitting. There is a very clearly felt “snap” when pushing the seal in. If the top of the seal is even with the windows in the tank fitting, it is incorrect, and will leak.
Lightly grease (I used Vaseline) the filler neck. Place the white snap ring on the filler neck. Carefully center the filler neck in the seal as you push the tank onto the filler neck – when greased it doesn’t take much force to slide the tank with seal up the filler neck, but there is some maneuvering of the tank around the floor pan and other obstructions. Concentrate on getting the filler neck fully seated into the tank and seal before trying to push the tank up into the floor pan cavity.
Here is what the finished joint should look like in cutaway:
Presentation2..jpg
 
Nice post and drawings! Those explain why mine leaked at first then mysteriously quit not long after. The seal must have worked it's way down all the way. So the important thing to note is that your seal is recessed inside the window of the tank (1/2") before you try putting the filler neck back in.
 
Thanks, and thanks to you for finding the part no.s, for some reason the no.s are not known at the dealers.

And yes, the key is 1/2" below the window. There is a very clear snap as it is pushed into position.
 
Back
Top